Texture and length decide which bun is yours: curls suit the Natural Curls Updo or the Curly High Bun, straight hair smooths into the Sleek Updo, and the Cornrow Braided Bun calls for a stylist.
The list runs from quick styles like the Loose Updo and High Messy Bun to the Cornrow Braided Bun, which is hard to do on yourself, and in most of them a single accessory such as a silk scarf, a floral clip, or jeweled pins does the decorating.
If your hair is wavy or curly, blow-dry it first, and do a full practice run a few days before homecoming so the night itself holds no surprises.
1. Natural Curls Updo
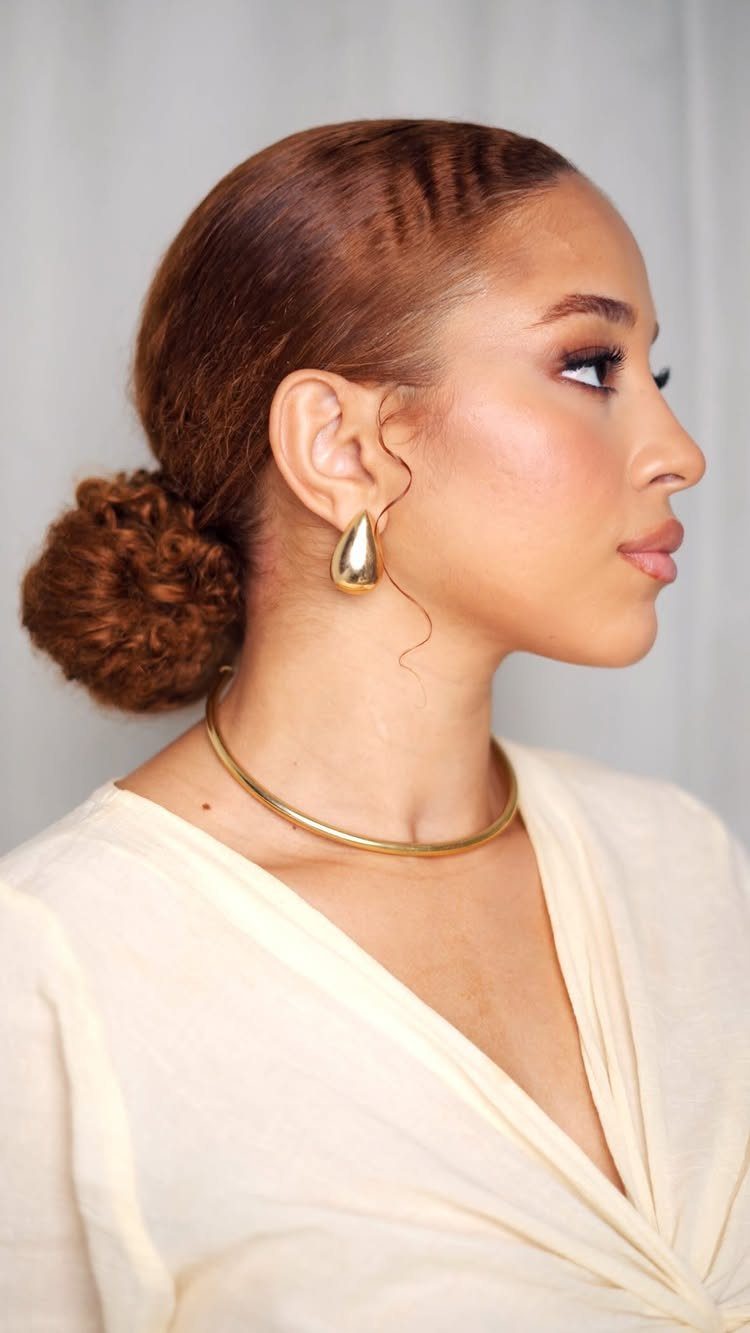
A low bun at the nape lets curls do the work, so skip the flat iron and the tight pull. Gather the hair loosely, pin the coil in place, and leave a few ringlets free near the face.
Gold jewelry and a wrap top in a neutral color keep the focus on the texture. Curls look best here when they are defined, so refresh them with a little water or curl cream before pinning.
2. Braided Bun
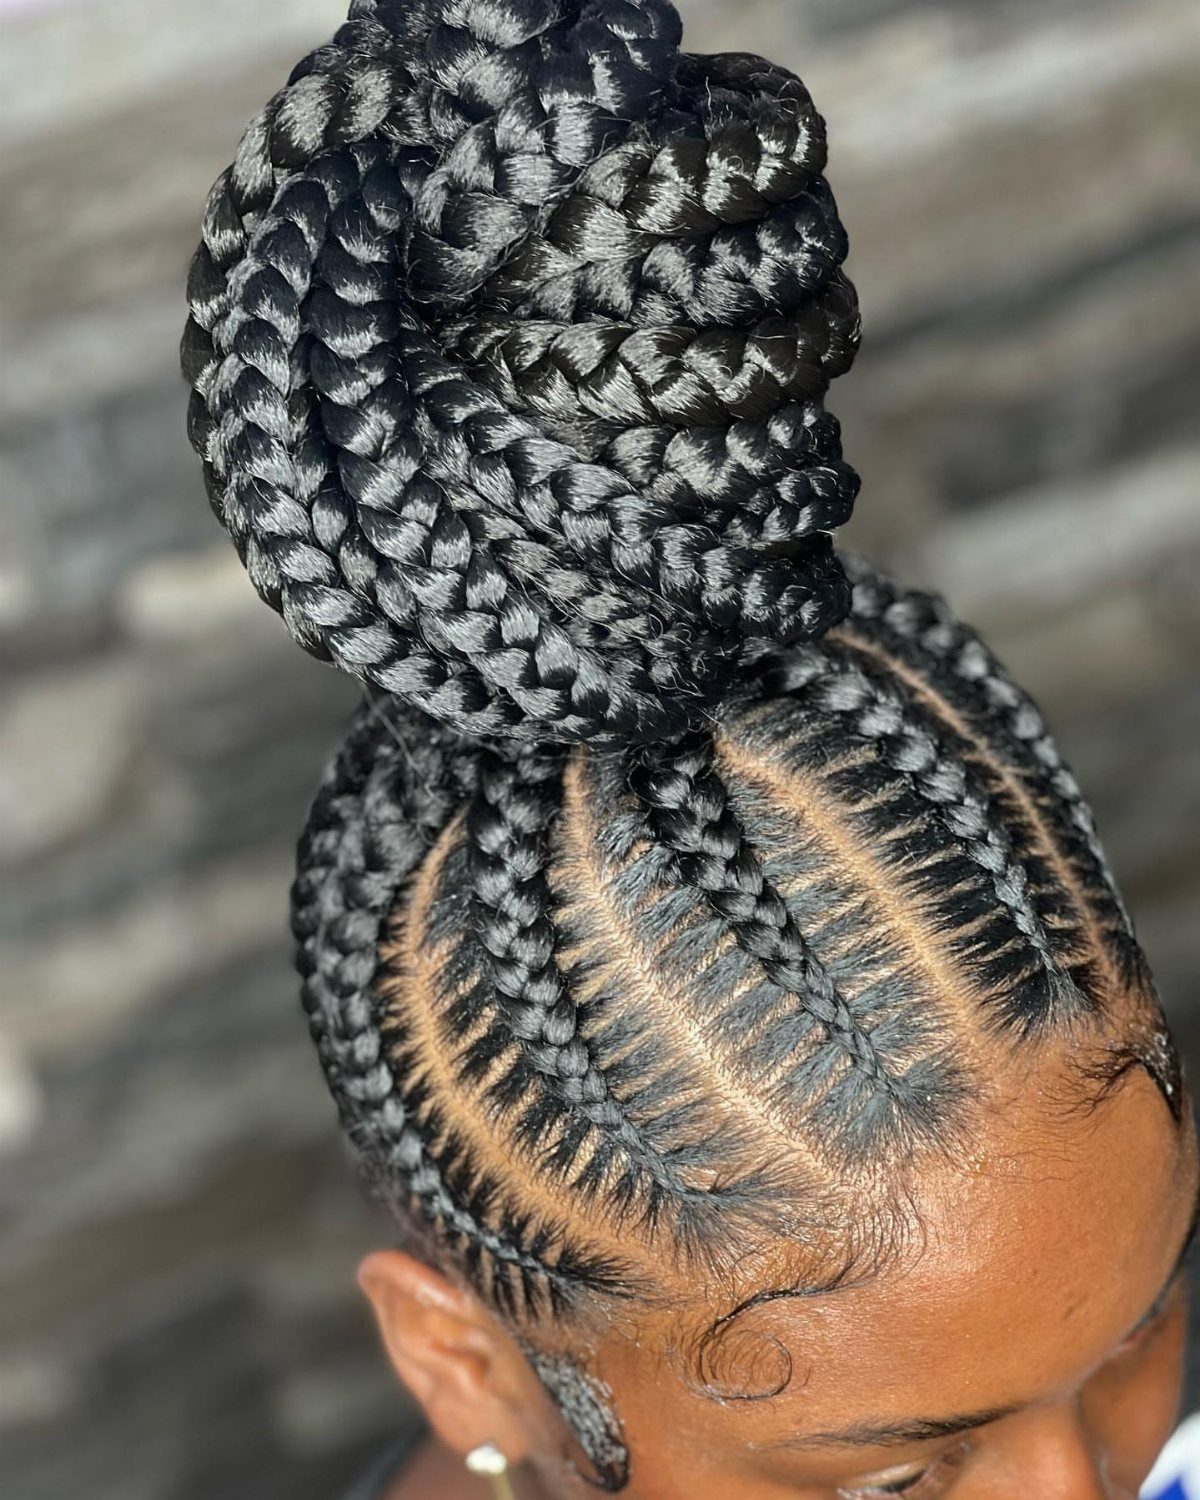
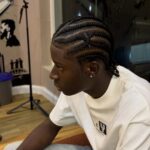
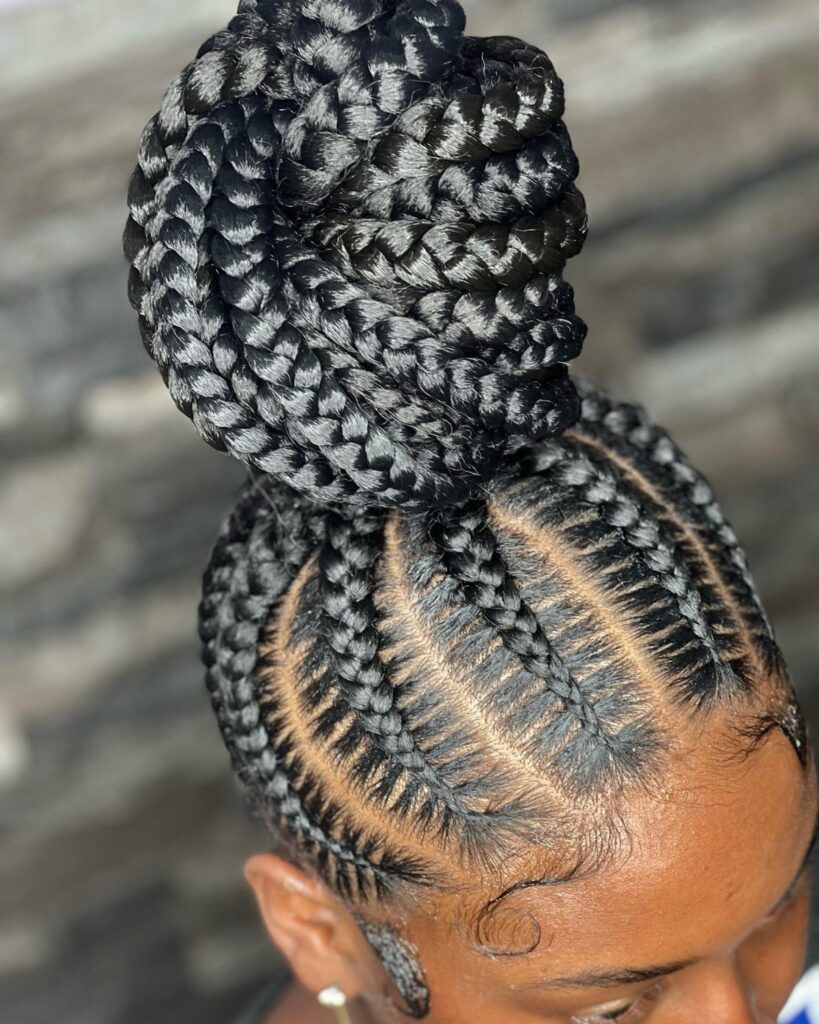
Cornrows turn a plain top knot into a structured style, since the braids guide the eye straight up into the coil. I like a large, full bun here because it balances the neat, tight lines at the sides.
Keep the rest of the look simple. A strapless or boat-neck dress shows off the shape from every angle, and extra accessories would only compete with the braidwork.
3. Loose Updo
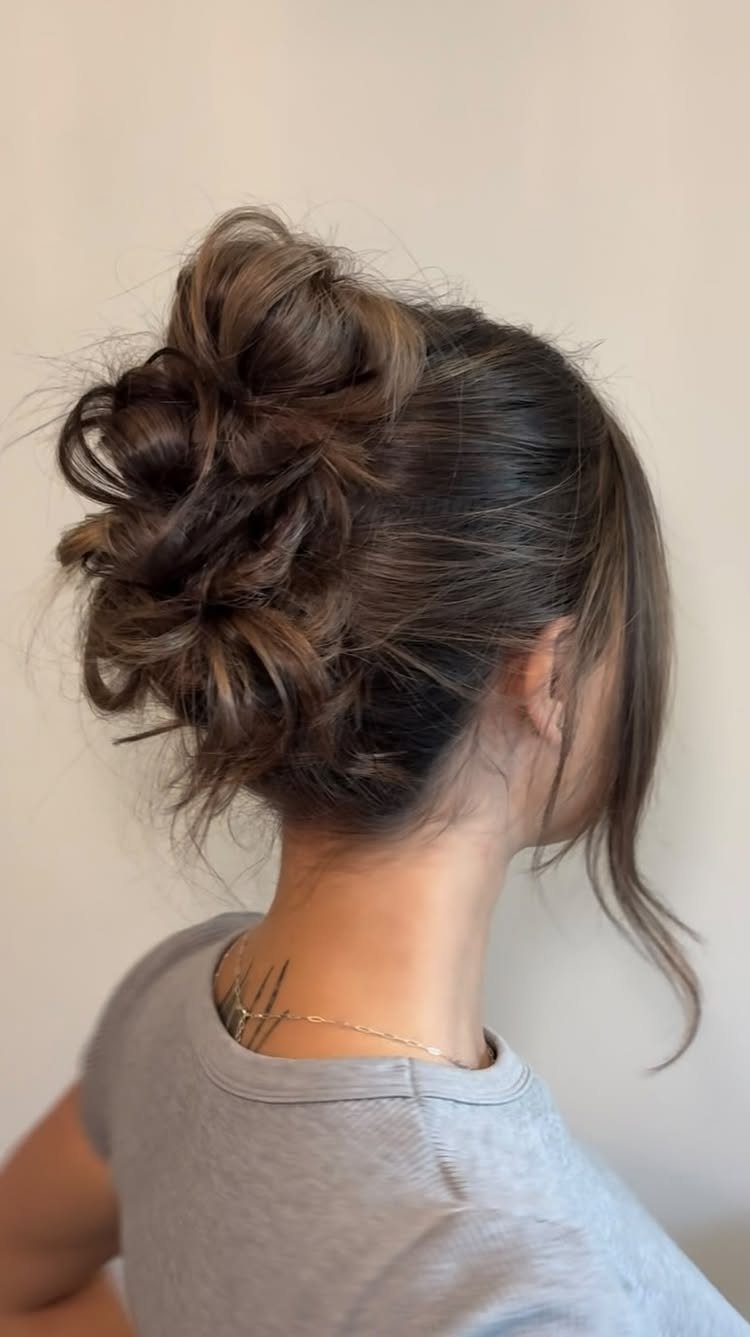
Loose and a little undone, this updo works because the strands are curled before they are pinned. Curl the hair first, then pile it up without smoothing it out, and let pieces fall where they land.
It pairs well with casual fabrics like a simple tee, and just as well with a dressier neckline. Volume is the goal, so pin gently rather than tight.
4. Sleek Updo
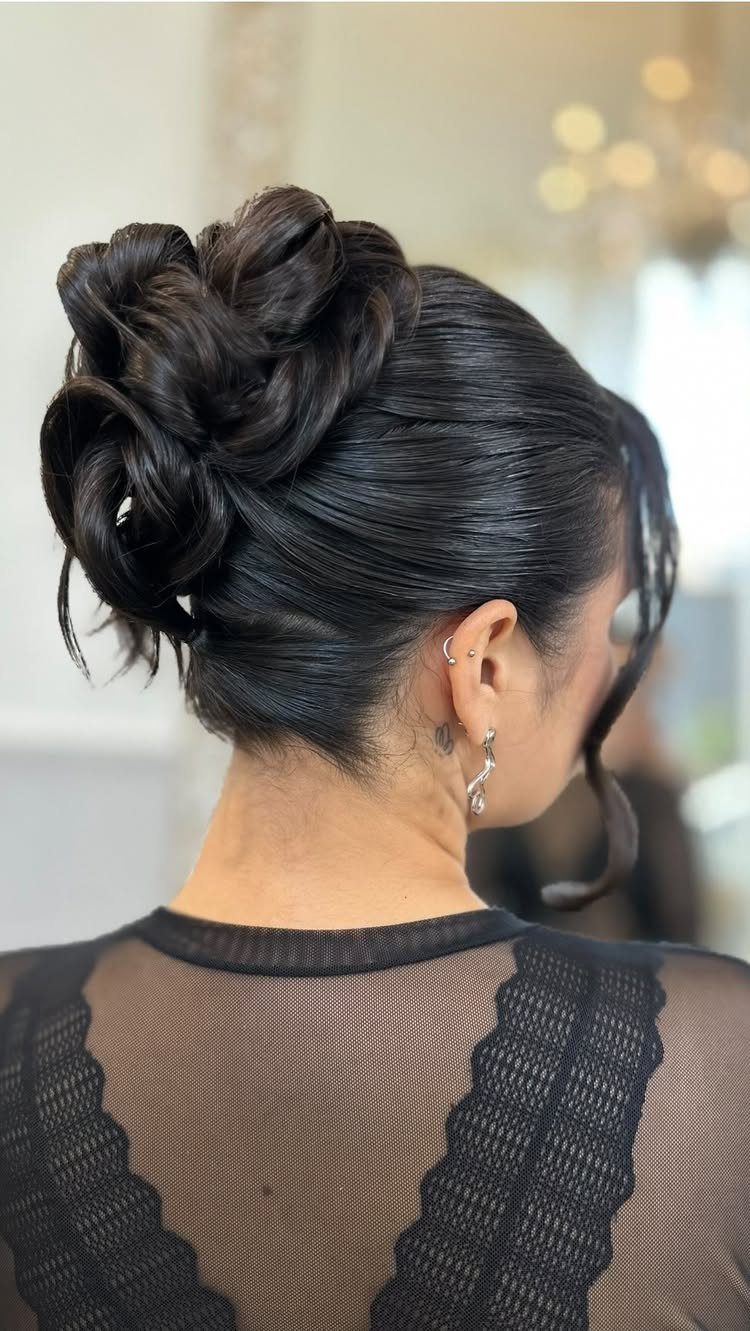
Sleek wins over messy for formal events, and dark hair makes the polish show. Smooth the surface, keep the shape full at the crown, and let the bun sit with some texture so it doesn’t look flat.
A black top or a dress with an open back suits it, since the whole style is meant to be seen from behind.
A flexible-hold spray keeps the surface smooth without stiffening it or leaving the white residue that heavy formulas can show in flash photos.
5. Low Textured Bun
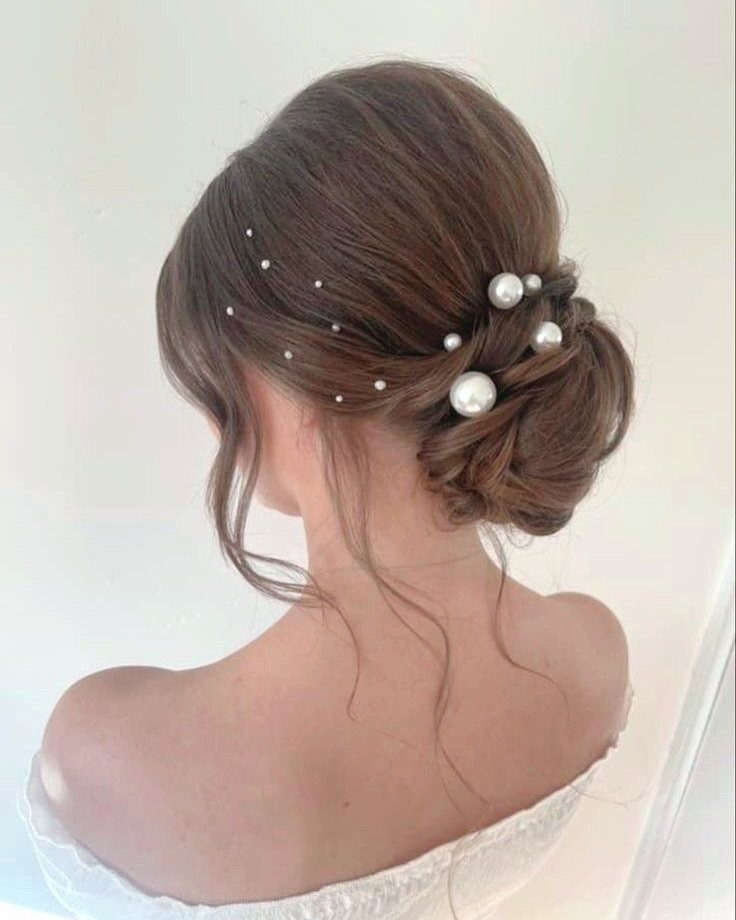
Pearl pins are the easiest upgrade for a low textured bun, and I would choose them over a bulky clip. Tuck them in after the bun is set, spacing them unevenly so the look stays relaxed.
An off-the-shoulder neckline leaves the nape open, which is where this bun sits. Rough up the texture with your fingers before you pin, and leave it a bit soft.
6. Twisted Low Bun
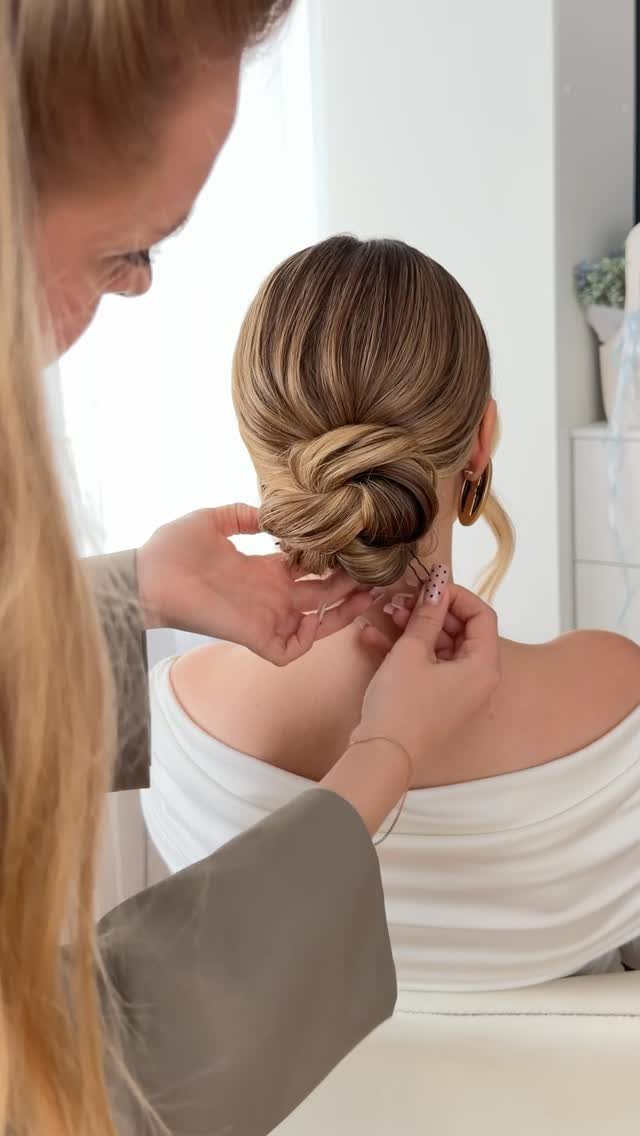
Twisting 2 sections of hair around each other gives a low bun its rope-like finish. Divide the hair at the nape, twist each half in the same direction, then wrap the twists together and pin the coil flat.
It is easier with a second pair of hands, especially on blonde hair where the twist pattern shows up well. Pick a simple top so the detail stays the focus.
7. Space Buns
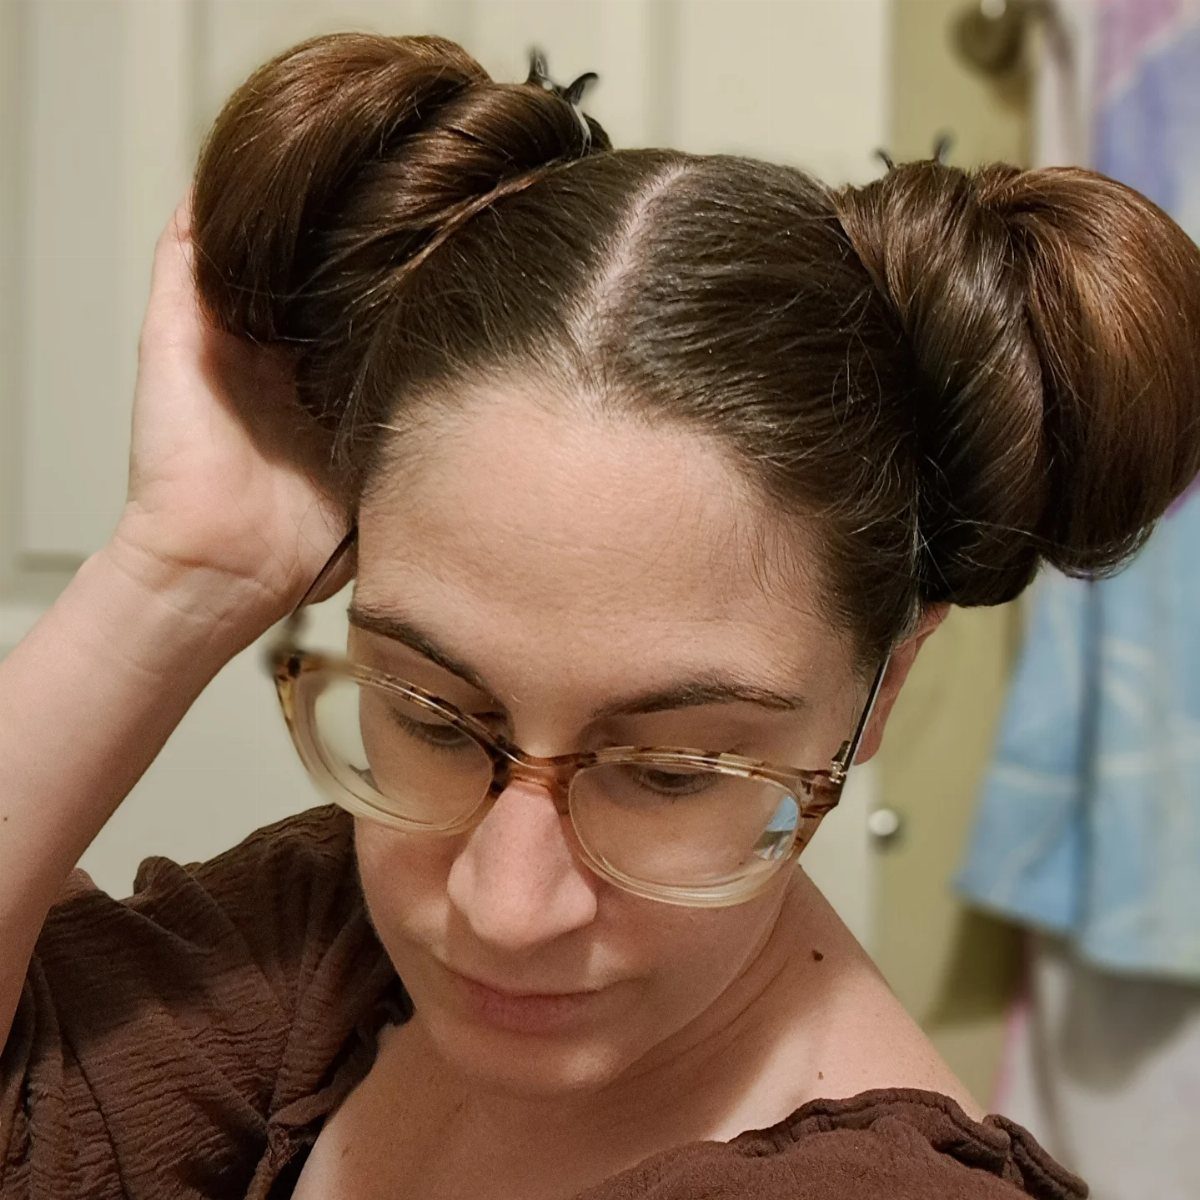
2 buns set high on either side of the head read playful, and glasses sit well between them since nothing crowds the face.
Part the hair down the middle first, then gather each side at the same height so the pair looks even.
A plain top, like the brown one here, keeps the hair as the single fun element.
8. Half Up Bun
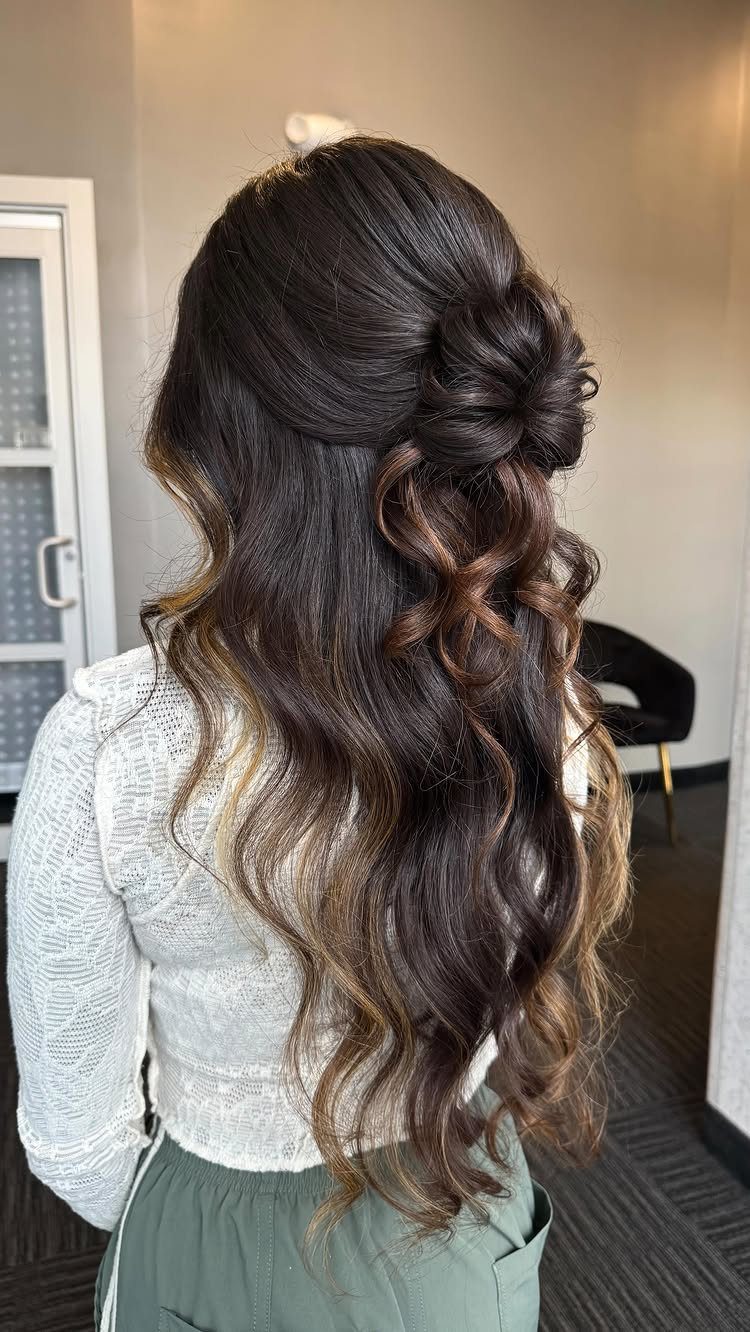
Half-up is my pick when you want an updo but don’t want to give up long hair. Wavy hair works well because the loose lengths below the bun already have movement.
Pull the top section into a bun and leave the rest down, curling any flat pieces so the 2 parts match.
From behind, a simple top and bold pants let the hair carry the outfit.
9. Double-Banded Bun
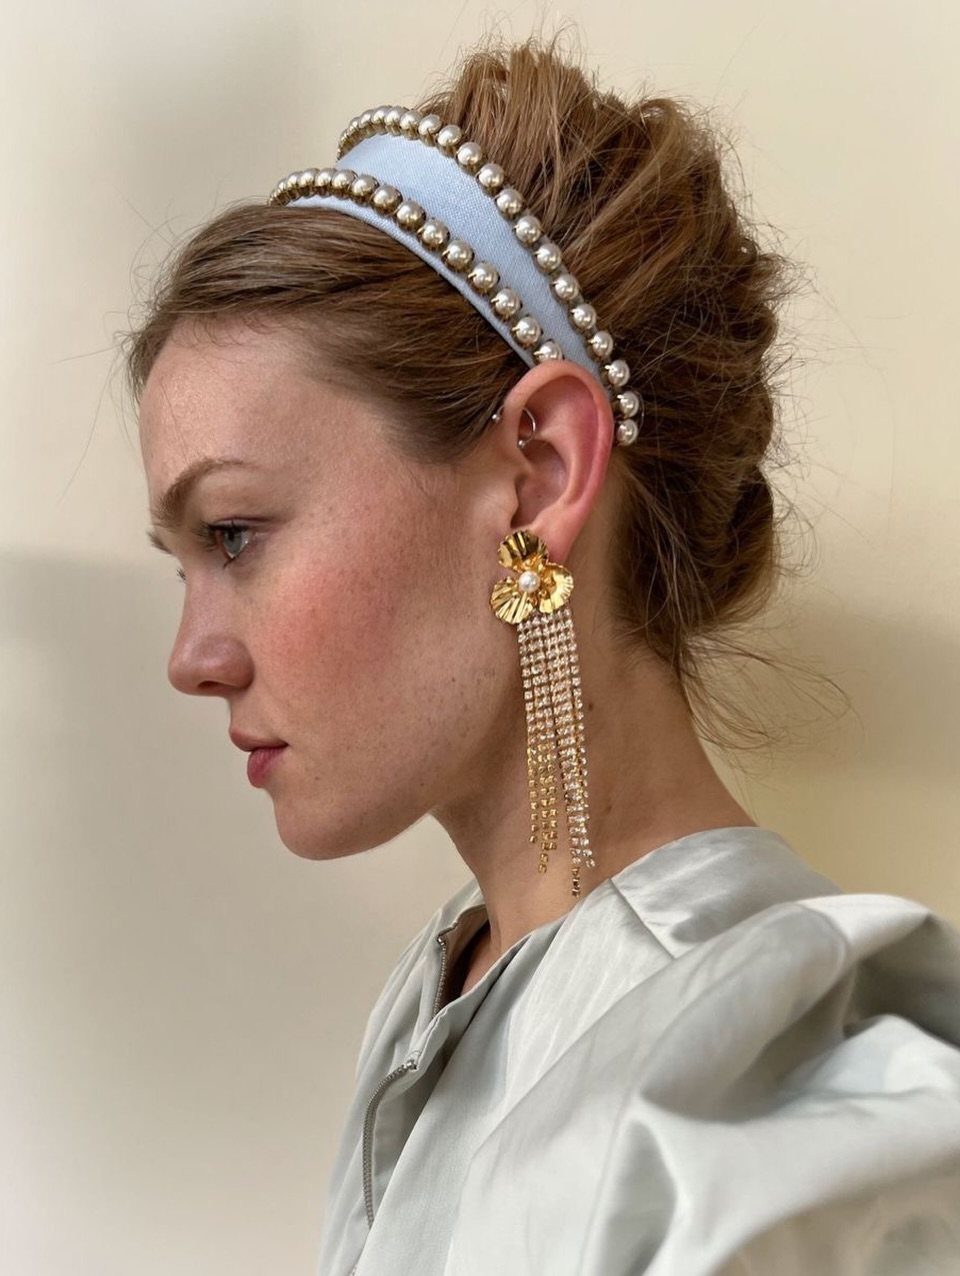
2 headbands stacked over a bun give a simple style a finished, dressed-up look. Pearl-embellished bands are the right choice for a formal night, and I like them paired with long gold earrings.
Set the bun first, then slide the bands on behind the hairline, one slightly behind the other, so both show. A satin garment keeps the whole look soft and polished.
Be the ballerina your 9-year-old self always dreamed of being, thanks to this elegant bun. Double up on glitzy headbands for a runway-inspired update.
10. Floral Sleek Low Bun
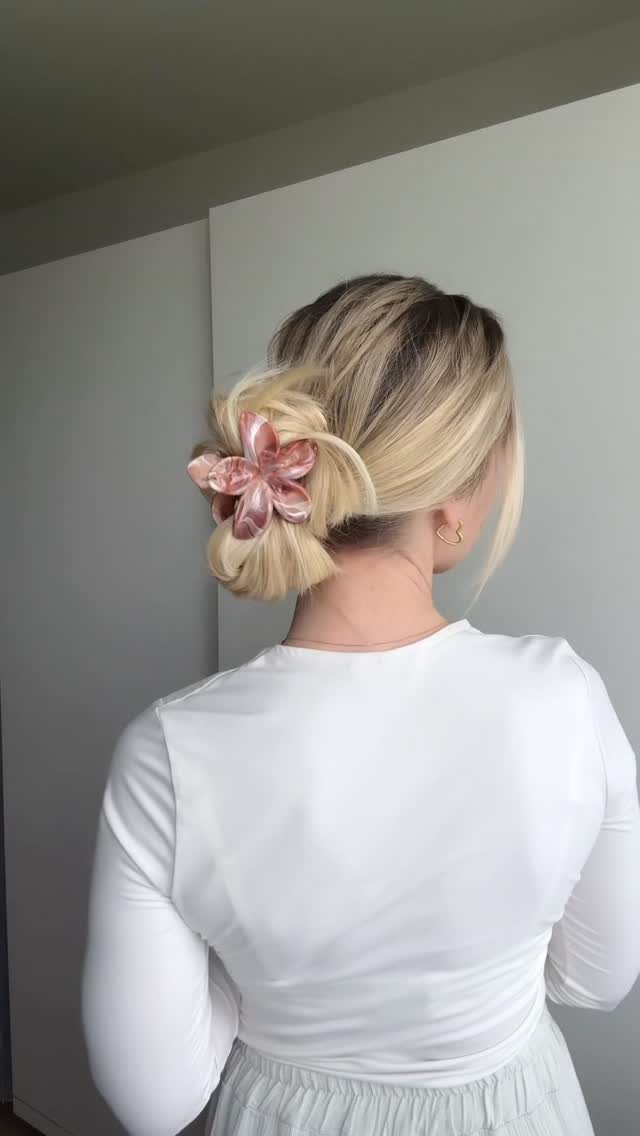
A floral clip does the decorating, so keep the bun itself smooth and low. Pin the bun first, then place the clip on one side of it rather than dead center, which looks less stiff.
Pink on blonde hair is soft and pretty. A plain white long-sleeved top lets the flower stay the only detail.
11. High Messy Bun
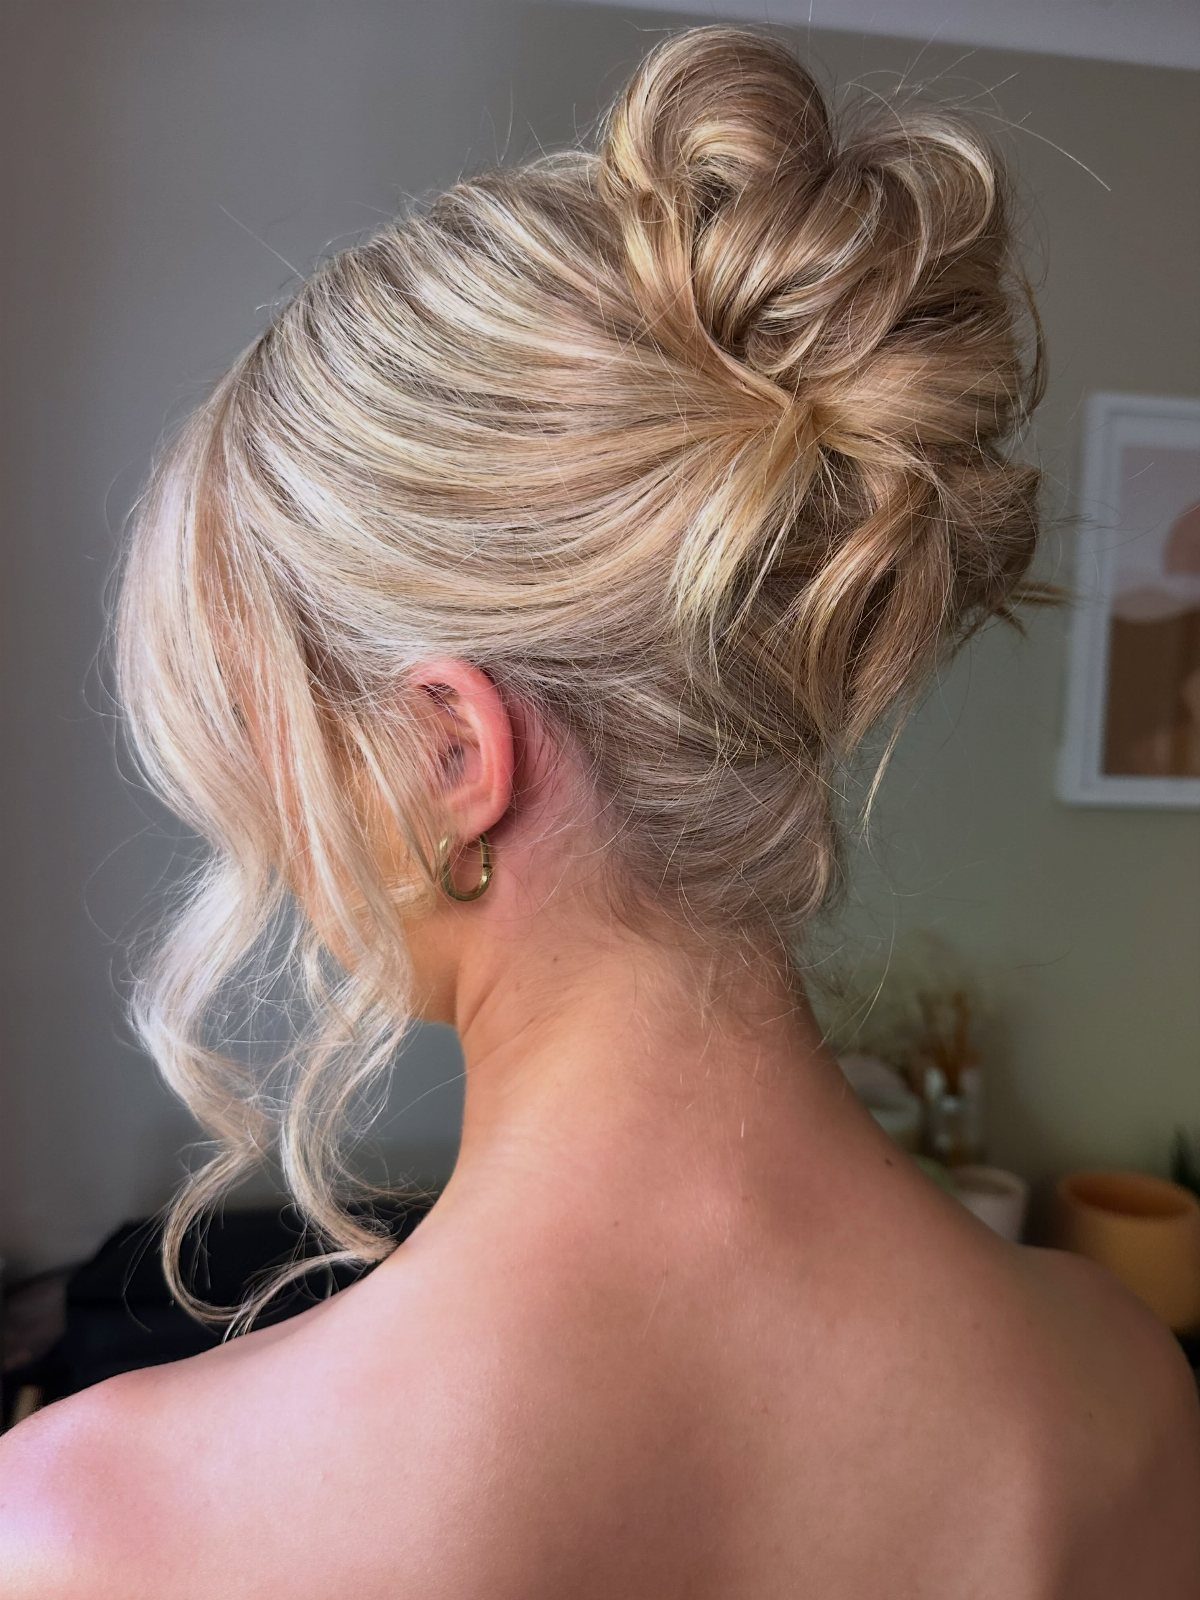
Height and a few curled tendrils make this messy bun look intentional. Gather the hair high on the crown, wrap it loosely, and pin it without pulling tight so it keeps volume.
Once the bun is set, curl the loose strands near your temples and ears, and leave them hanging free. A single gold earring is enough jewelry, since the hair is already busy.
12. High Bun with Scarf
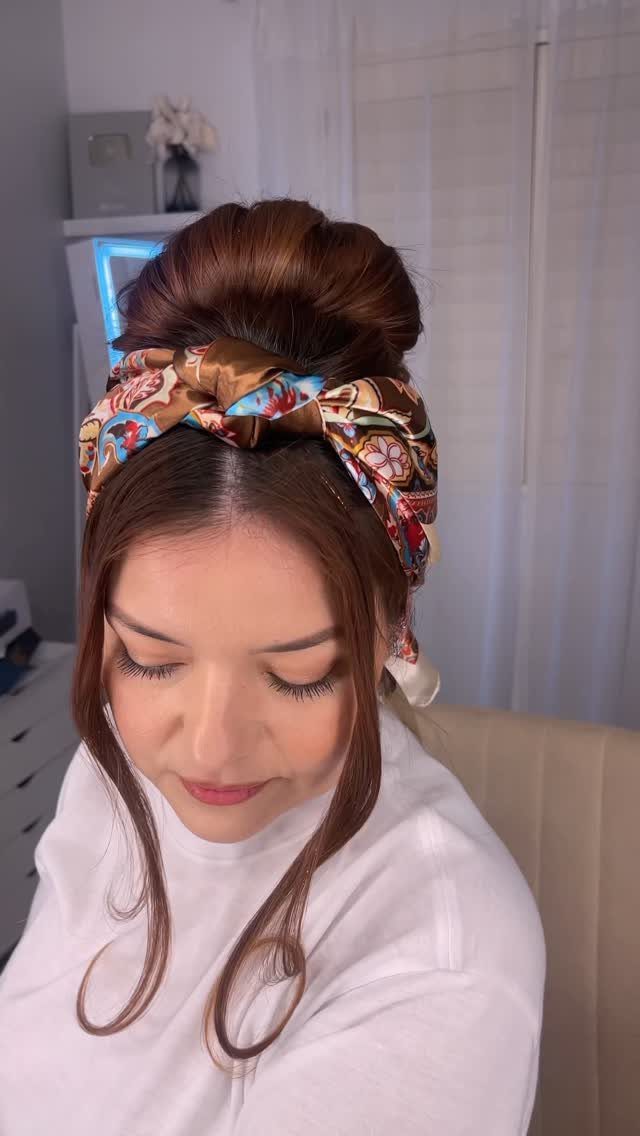
A silk scarf wrapped at the base of a high bun works as both hair tie and accessory.
Build the bun with some volume and lock it in with an elastic; the scarf goes on after, wrapped over the base and knotted tight and tidy.
A patterned scarf is best with a plain outfit, such as a white tee, so the print stands out and nothing competes with it.
13. Low Knotted Bun
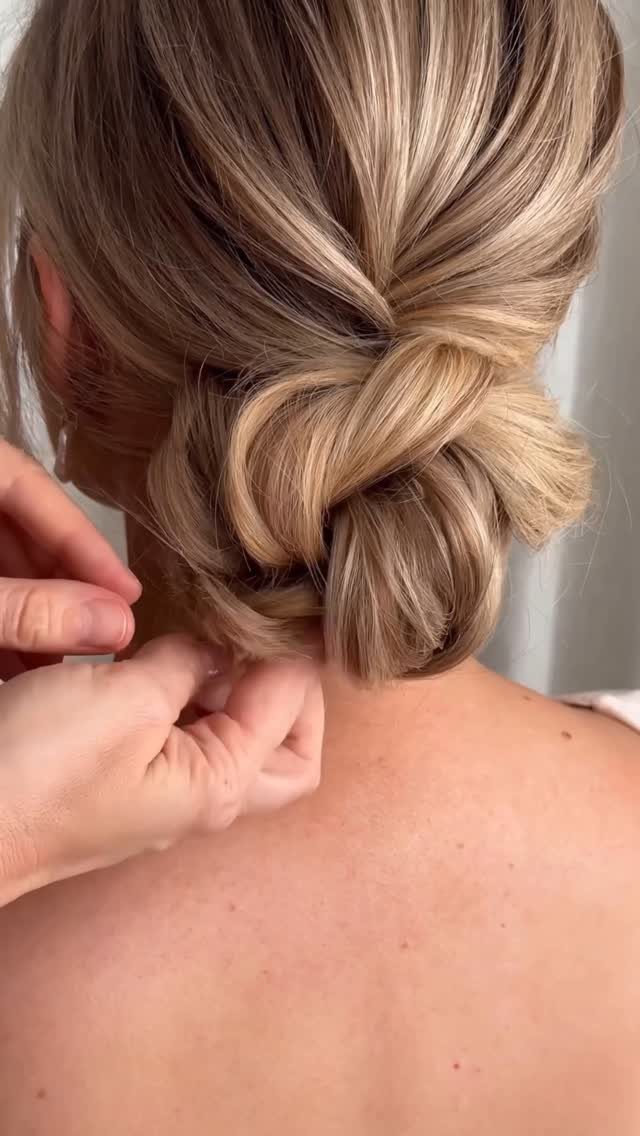
Knotting the hair at the nape, instead of coiling it, gives a low bun its shape without a bulky base. Gather everything low, tie the length into a loose knot, and pin the ends underneath.
Blonde hair shows the folds well, so leave the knot slightly soft and let the lines stay visible. A second pair of hands helps, since the nape is hard to see while you work.
14. Jeweled Low Bun
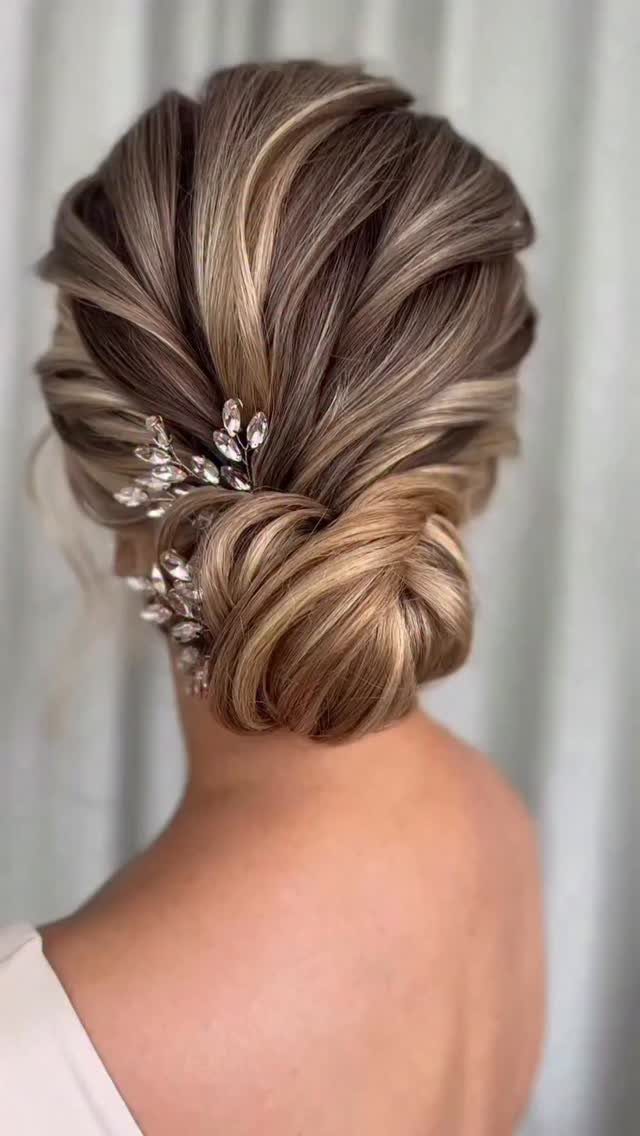
A silver jeweled clip is all the decoration a wavy low bun needs, and I would pick one with a floral shape over a plain barrette.
Curl or wave the hair first, gather it low, then pin the bun and set the clip on top.
Blonde highlights catch the sparkle nicely. With a jeweled bun doing the work at the nape, small studs or bare ears let the hair stay the focus, and a plain neckline or simple dress keeps the back view clean.
15. Curly High Bun
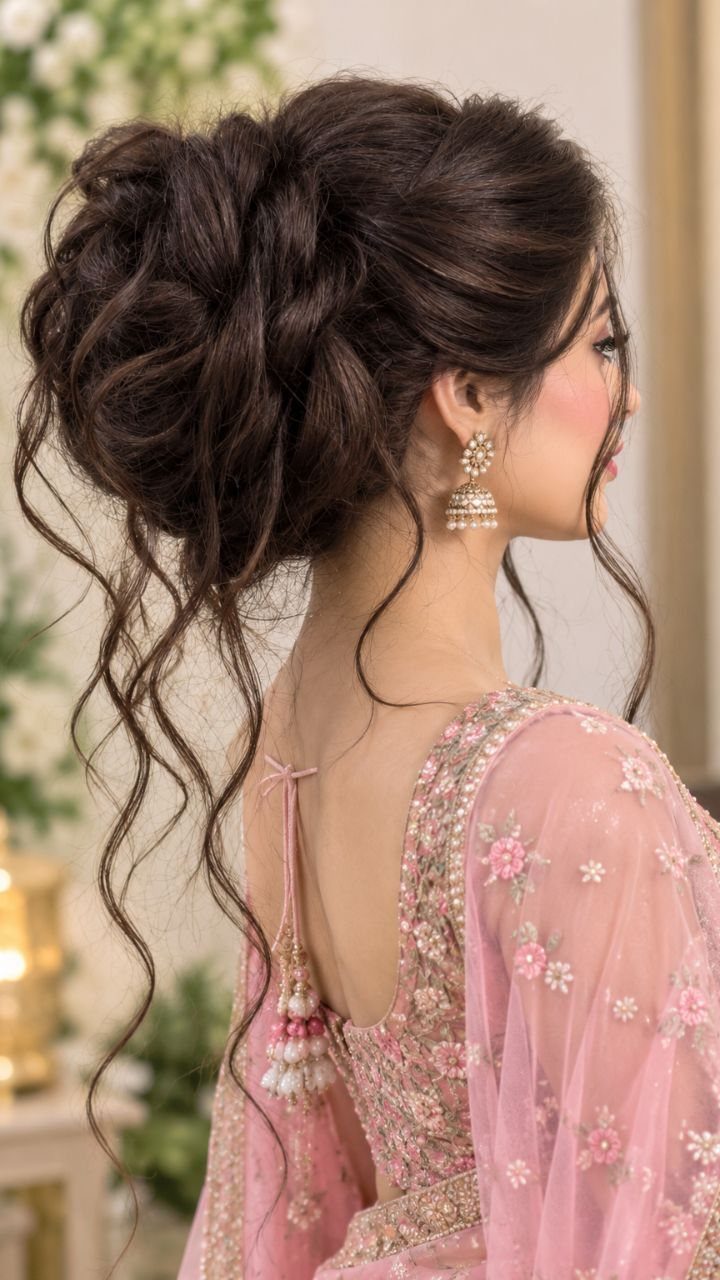
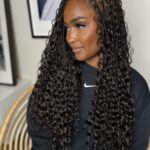
Volume is what makes a curly high bun work, so gather the curls at the crown without brushing them flat.
Pin the bun loosely and tease out a few soft tendrils near the temples and cheeks; they flatter more than a tight, slicked hairline ever will.
Dark curls pair well with embroidered fabric and ornate earrings, since the bun’s height balances the detail.
16. Cornrow Braided Bun
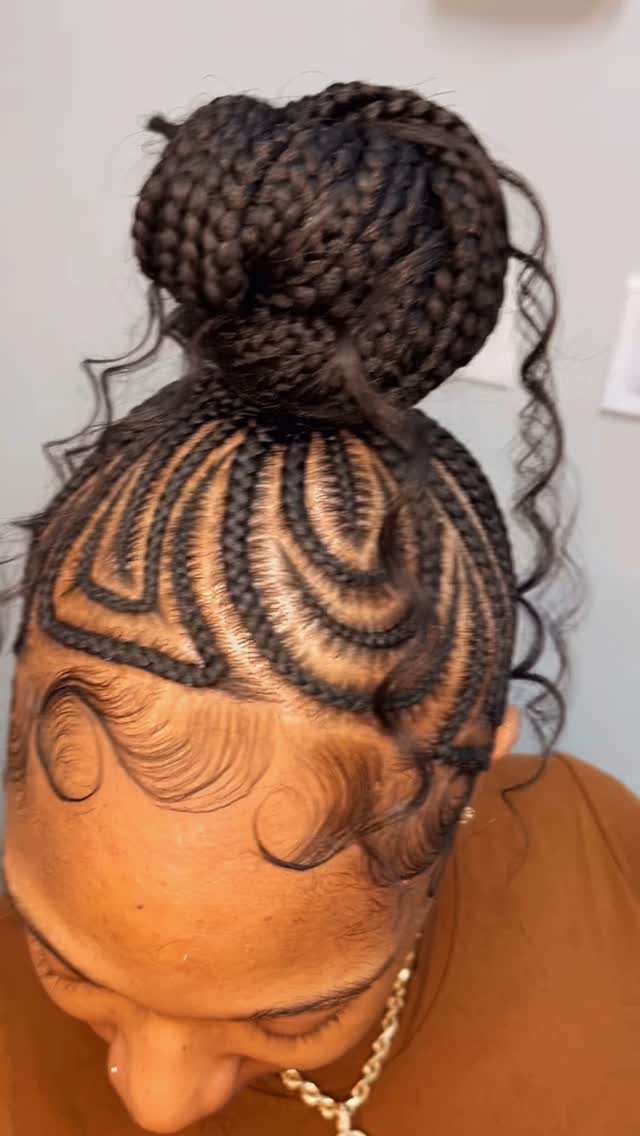
Curved cornrows lead the eye up into the bun, and I prefer them over straight lines for a formal night. Braid the rows back toward the crown, gather the ends, and wrap them into one large bun.
Plan on a stylist, since cornrows this detailed are hard to do on yourself. Leave a few curly edges out; they soften the neat lines and keep the look from feeling severe.
Choosing the Right Hairstyle
Hair length, texture, and your own comfort level should decide the style before any photo does.
A style that looks perfect but pulls at your scalp or needs constant fixing will wear on you by the second hour of the night.
Do a full run-through before the event, in the same hair state you will have that day. Check whether it holds after you sit, dance, and put a jacket on.
If you want the simplest route, smooth hair with one statement accessory works at any length, including short hair.
Plan on 5–30 minutes, with the longer end reserved for days you flat-iron first, and even a beginner can pull this one off.
A dress with heavy beading or embroidery already does plenty, so I would stop at a single hair accessory.
Accessorizing Your Hairstyle
Clips and pins suit nearly every length, from waist-long hair to a chin-length bob, which makes them my easiest way to personalize a bun without changing its shape.
Curl the hair first with a curling iron to get the waves, then finish with something sparkly. The texture gives the sparkle something to catch, which makes short hair look dressed up.
Clips also work well on a mid-height ponytail.
Choose one accessory style per look, whether sparkly, floral, or jeweled. Stick to a single finish so the hair looks planned rather than crowded.
Styling Tips for Homecoming
A sleek finish depends on the prep. Gathering too much at once is what causes bumps.
Straight hair smooths easily. If your hair is wavy or curly, a blow-dry beforehand may be needed, and that extra time can turn a 5–15 minute style into a longer job.
Comfort is a real test.
A high bun that causes a headache should sit a little lower, since a secure hold never needs to hurt. Very long or dense hair can also feel heavy when pulled high.
For formal updos, stock up on hairpins and bobby pins before you start, and keep your styling products within reach. Sparkly combs add shine at the end.
Practice the harder styles at least once before the event, so the real day is a repeat.
Frequently Asked Questions
What are some good hairstyles for women for a homecoming event?
A sleek low bun, a loose curled updo, or a half-up bun are the easiest picks.
Sleek reads best for formal nights, especially on dark hair, while half-up lets you keep your length and works well on wavy hair. Choose by hair length, texture, and how long you can stand the style before it bothers you.
Are messy buns still in style in 2026?
Yes, as long as the mess looks planned.
For a homecoming-ready messy bun, start with a high crown ponytail, twist it into a loose coil without cranking the elastic, and anchor it with 4–6 pins, then pull a few curled strands loose by the temples and ears.
How to make a bun look classy?
Keep it low and smooth, then add one accessory. A low bun at the nape with a little height at the crown looks polished, and pearl pins, a floral clip, or a silk scarf each add a finished touch.
Stop at one accessory style per look, especially with a beaded or embroidered dress, so the hair looks planned.